
You spend time putting together a design that looks great. Then you realize you need it in three more sizes for three more platforms, and the prospect of rebuilding it from scratch (or worse, squishing everything into a different canvas and hoping it still works) is enough to make you close the tab entirely.
There's a better way. Canva has a built-in resize feature for Pro users that handles this in seconds, and even on the free plan there's a process for adapting designs across platforms without starting over every time.
Here's how to do both.
The Quick Reference: Canva Design Sizes by Platform
Before resizing anything, it helps to know what you're resizing to. Here are the standard dimensions for the most common platforms:
- Feed post (square): 1080 x 1080px
- Feed post (portrait): 1080 x 1350px
- Story / Reel: 1080 x 1920px
- Feed post: 1200 x 627px
- Document / Carousel: 1080 x 1080px (square) or 1080 x 1350px (portrait)
- Profile banner: 1584 x 396px
- Feed post: 1200 x 630px
- Story: 1080 x 1920px
- Cover photo: 820 x 312px
- Standard pin: 1000 x 1500px
- Square pin: 1000 x 1000px
YouTube
- Thumbnail: 1280 x 720px
- Channel art: 2560 x 1440px
TikTok
- Video / graphic: 1080 x 1920px
Twitter / X
- Post image: 1600 x 900px
- Header: 1500 x 500px
Method 1: Magic Resize (Canva Pro)
Magic Resize is Canva's one-click solution for adapting a design to new dimensions. It resizes the canvas and intelligently repositions your elements so you're starting from something sensible rather than a scrambled mess.
Note: Magic Resize is a Canva Pro feature. Free plan users, skip to Method 2.
Step 1: Open the design you want to resize
Start with your existing Canva design open.
Step 2: Click "Resize" in the top toolbar
You'll see a Resize button in the top left of the editor, next to your design dimensions. Click it.
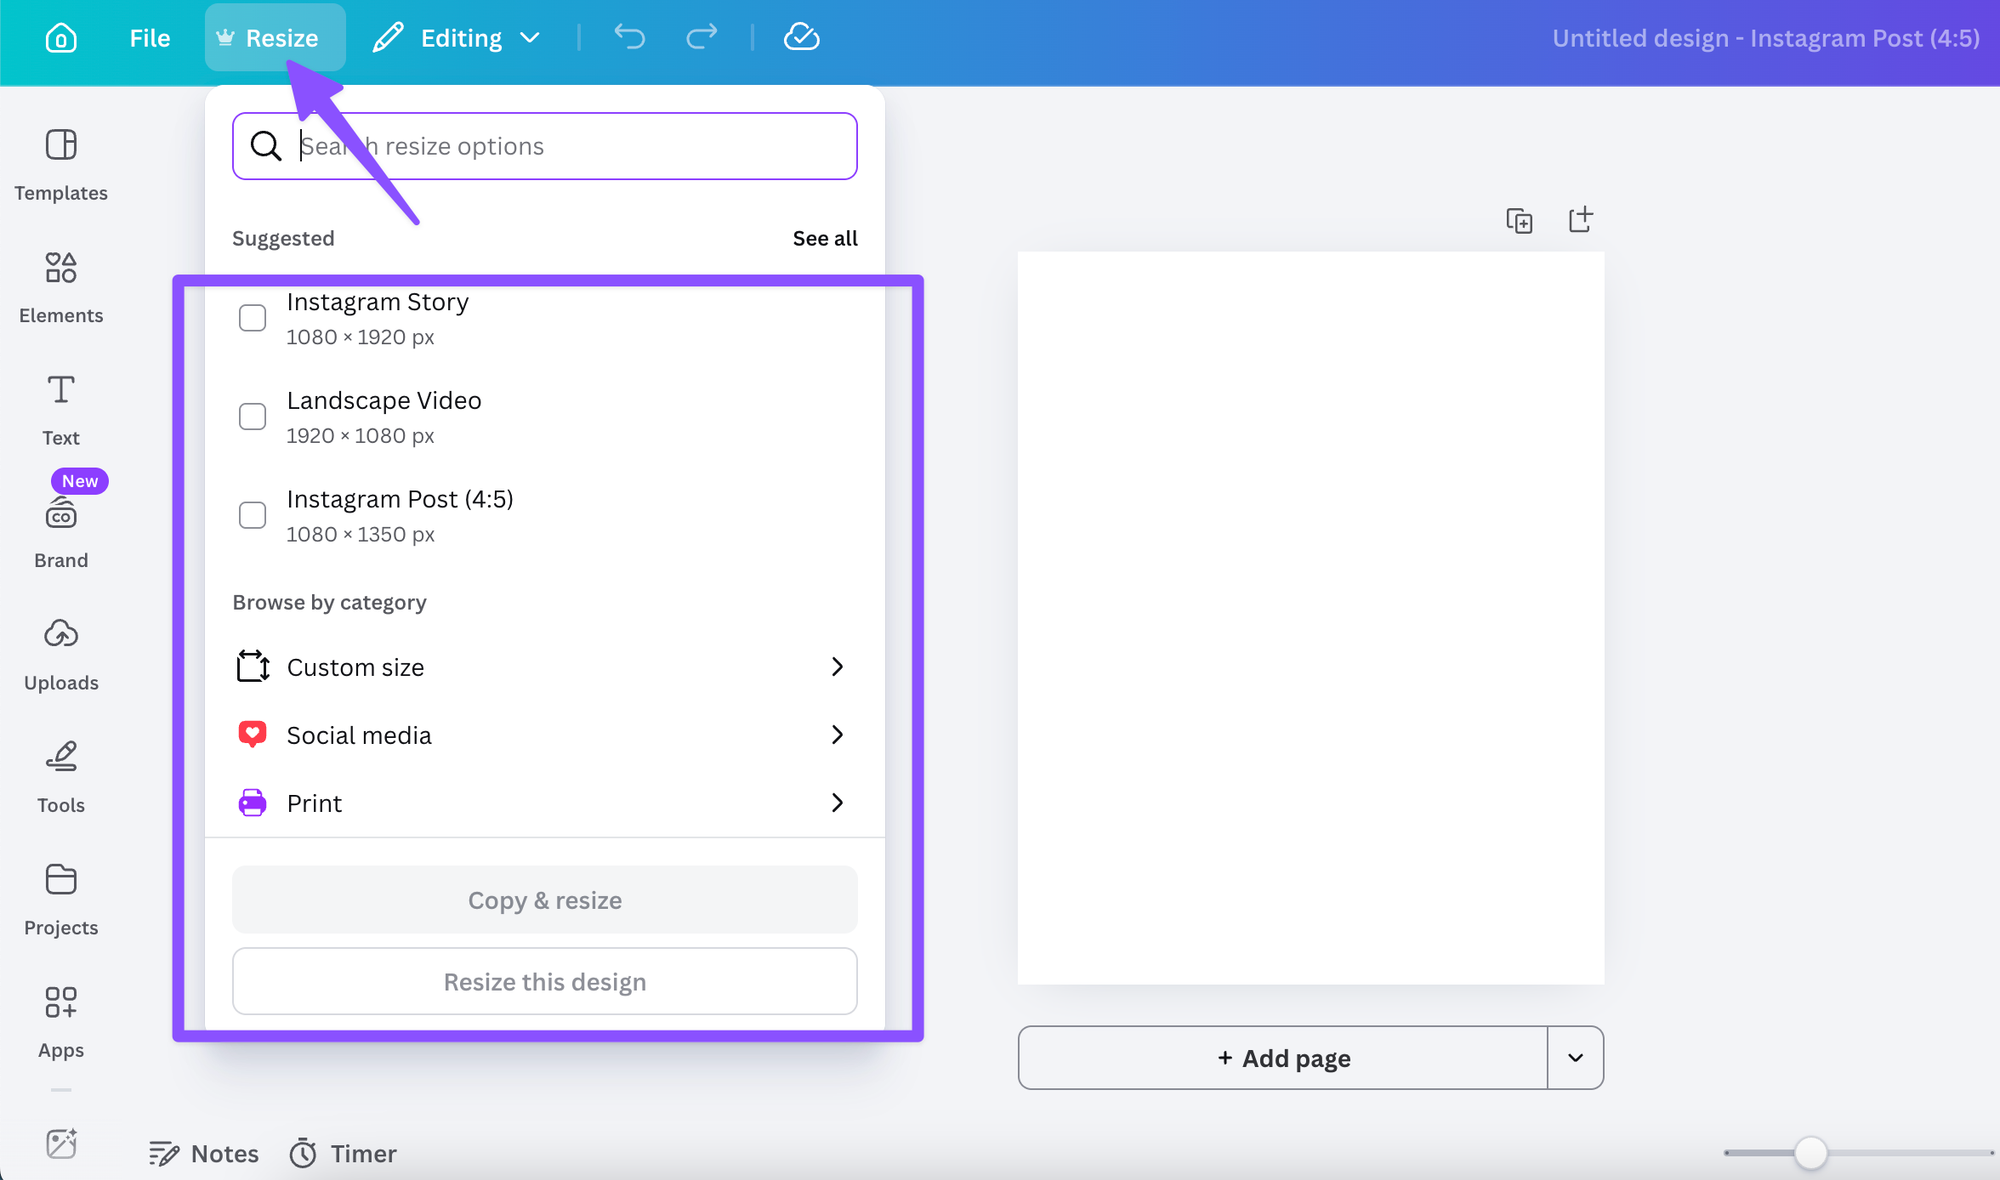
Step 3: Choose your new dimensions
A panel opens with preset options for all major platforms. You can select from the preset list (Instagram Post, LinkedIn Post, Facebook Story, and so on) or type in custom dimensions manually.
You can select multiple sizes at once, which is useful when you need the same design adapted for several platforms in one go.
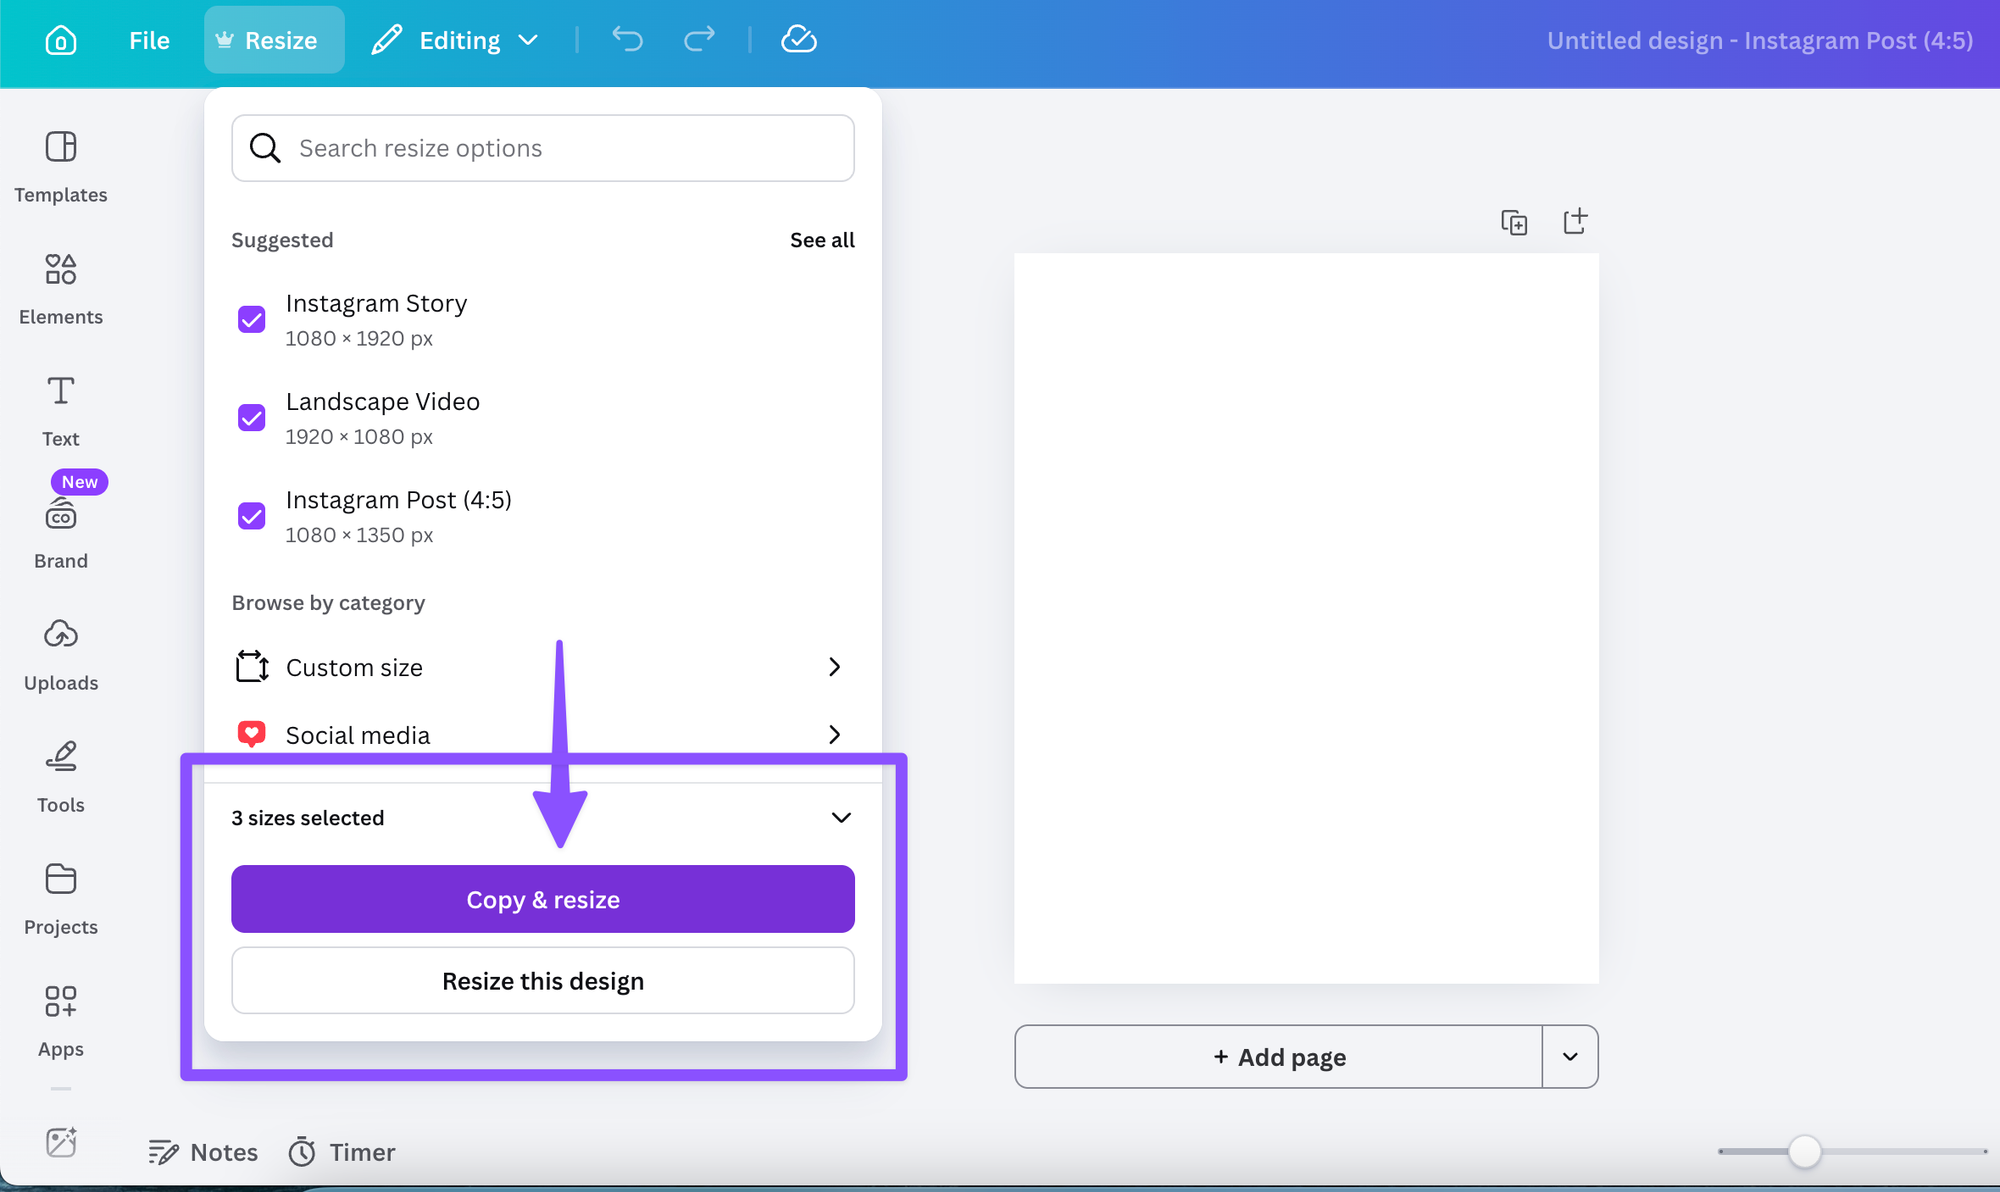
Step 4: Click "Copy and resize"
This is the important step. Always choose Copy and resize rather than just Resize. This creates a new version of your design at the new dimensions while keeping your original intact. You'll end up with separate pages for each size, all within the same Canva file.
Step 5: Review and adjust
Magic Resize does a good job, but it's not perfect. After resizing, go through each version and check that nothing important has been cropped, that text is still readable at the new size, and that the overall layout still makes sense. A few manual tweaks at this stage are usually all it takes.
Method 2: Manual Resizing (Free Plan)
Without Magic Resize, the process takes a little longer but is still straightforward. The key is working efficiently rather than rebuilding from scratch.
Step 1: Note your element positions before starting
Before you do anything, take a screenshot of your original design or write down the rough layout. This gives you a reference to work from when reassembling at the new size.
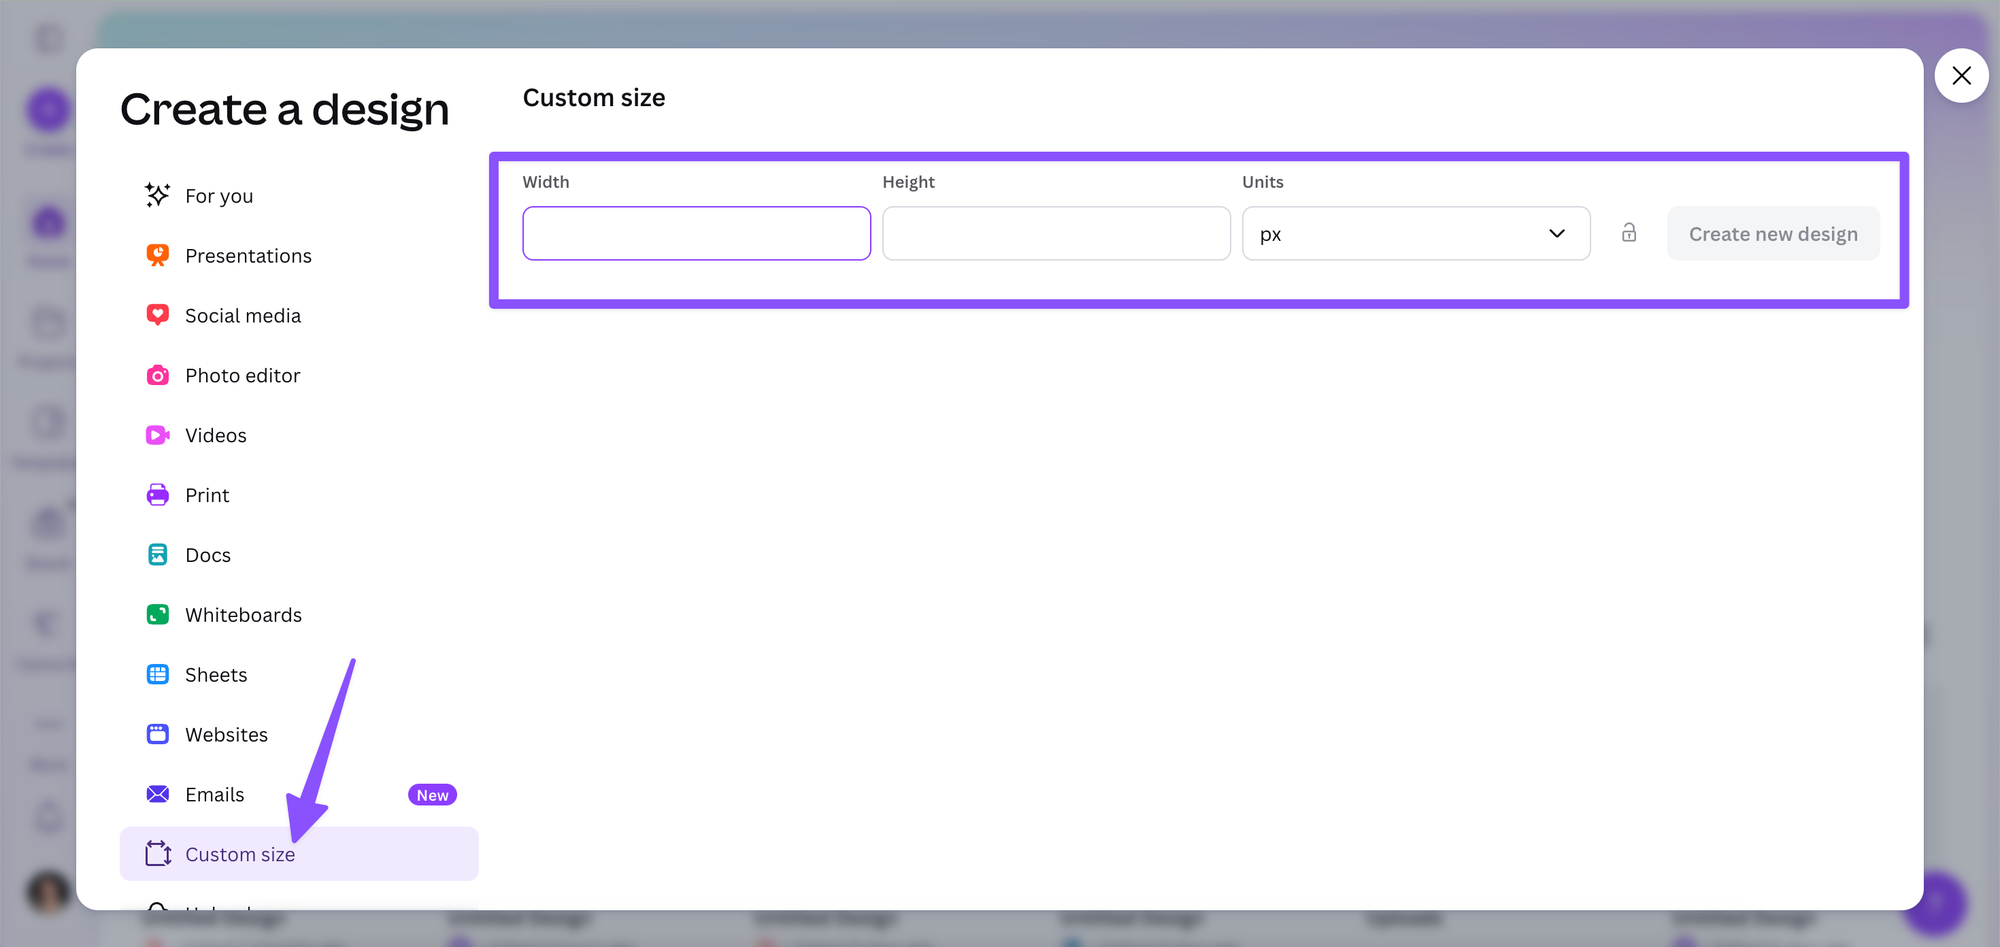
Step 2: Create a new design at your target dimensions
From the Canva home screen, click Create a design, then Custom size. Enter your new dimensions and create the design.
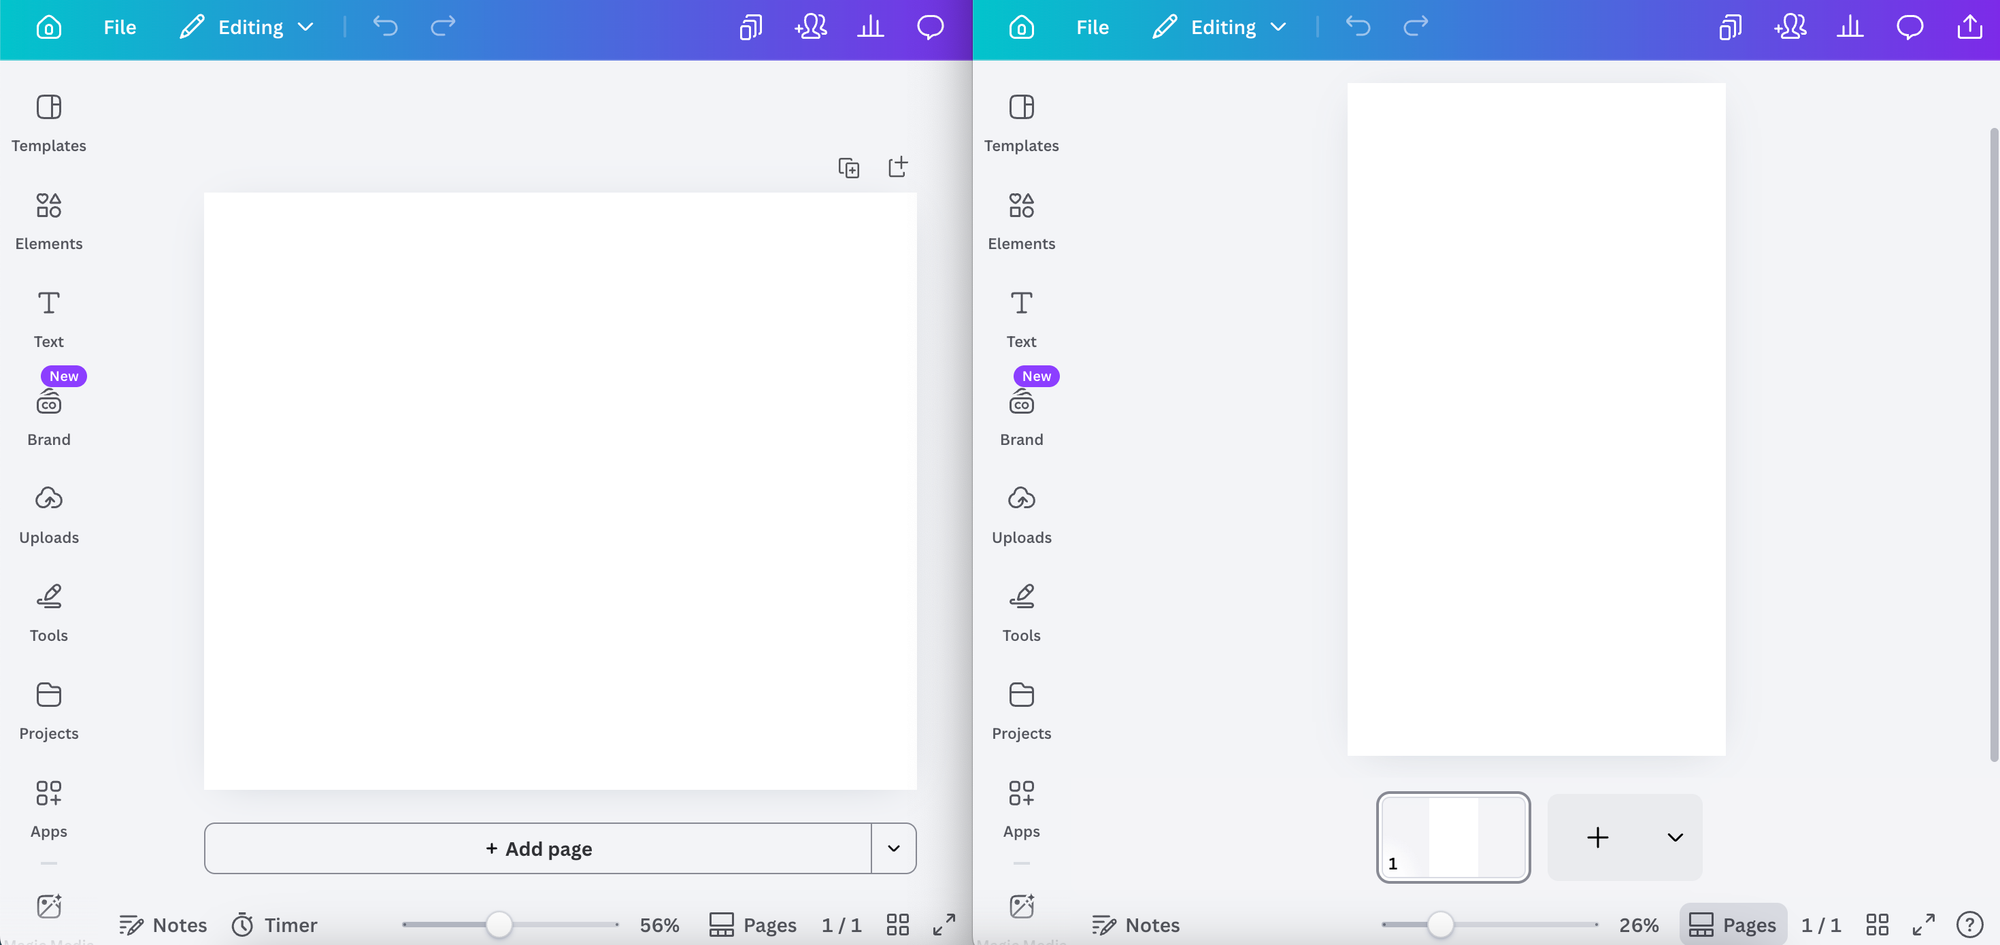
Step 3: Open both designs side by side (or use multiple tabs)
Open your original design in one browser tab and your new blank canvas in another. This makes copying and pasting elements much easier.
Step 4: Select and copy elements from your original
In your original design, click an element (or select all with Cmd/Ctrl + A), copy it, then switch to your new canvas and paste. Repeat for each section of your design.
Step 5: Reposition and resize elements to fit
Once everything is pasted into the new canvas, adjust the size and position of each element to suit the new dimensions. Keep the hierarchy the same (headline prominent, supporting details smaller) and maintain your visual spacing.
Step 6: Check fonts and colours
Canva usually preserves your fonts and brand colours when pasting between designs, but it's worth double-checking, especially if you're switching between significantly different canvas sizes.
Tips for Smarter Resizing
Design mobile-first. Start with the square (1080 x 1080px) or portrait (1080 x 1350px) format, since these are the most restrictive in terms of space. Adapting from smaller to larger is almost always easier than the other way around.
Keep important content away from edges. Anything too close to the edge of your canvas is at risk of being cropped when the design is adapted to a new size. A safe margin of around 100px on all sides gives you room to move.
Save brand elements as a group. If you have a logo, brand bar, or footer that appears consistently across your designs, group those elements together in Canva (select them all and press Cmd/Ctrl + G). Grouped elements resize and reposition as a unit, which saves a lot of fiddly individual adjustments.
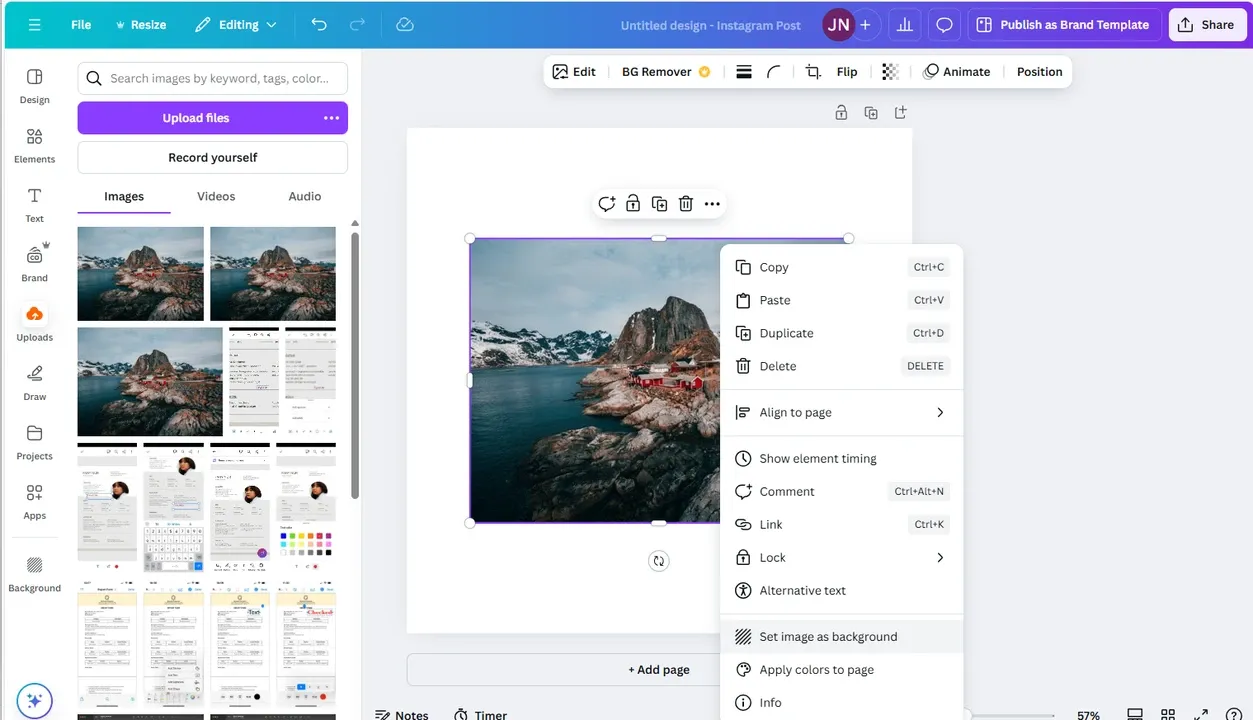
Use Canva's alignment tools. When repositioning elements after a resize, the alignment guides (which appear automatically as you drag) and the Position panel (under the element toolbar) help you keep things centred and evenly spaced without eyeballing it.
A Note on Carousel Posts
Carousel posts for Instagram and LinkedIn both work well at 1080 x 1080px (square), making them one of the more efficient formats to produce since you typically don't need to resize between the two platforms. For LinkedIn specifically, carousels are uploaded as PDF documents rather than individual images, so your Canva pages become the slides.
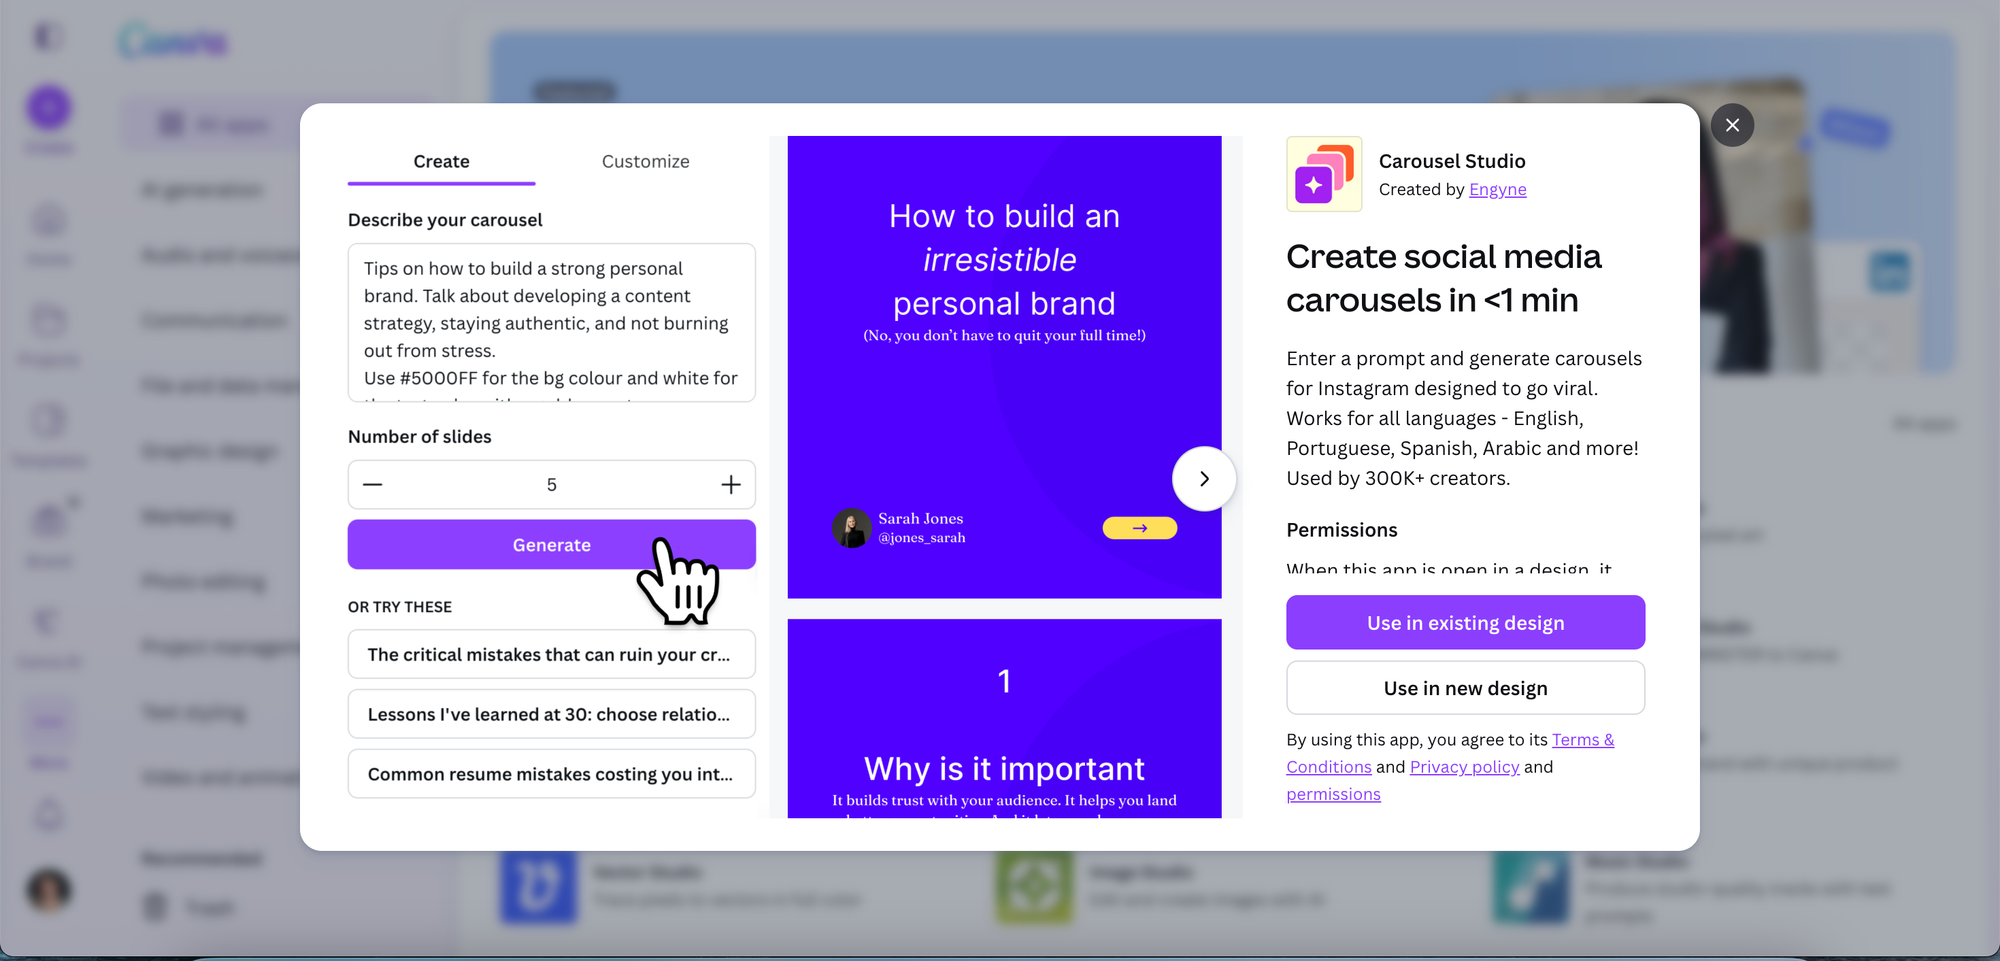
Tools like Carousel Studio generate carousel designs inside Canva at the right dimensions from the start, which means one less thing to think about in your workflow.
Frequently Asked Questions
Does Canva automatically resize for every platform?
Canva Pro's Magic Resize feature handles most major platforms with preset options. For platforms not on the preset list, you can enter custom dimensions manually. Free plan users need to resize manually, but the process is straightforward once you're familiar with it.
Will Magic Resize mess up my design?
It depends on the complexity of the design and how different the new dimensions are from the original. Simple designs with text and a background usually resize cleanly. More complex layouts with overlapping elements or unusual positioning may need some manual adjustments afterwards. Always use "Copy and resize" so your original is preserved.
Can I resize a Canva design after I've already started?
Yes. You can use the Resize button at any point, not just at the start. That said, adapting a design mid-way through is slightly more work than resizing a finished version, since you may need to redo some of the adjustments you've already made.
What's the best Canva size for Instagram in 2026?
Portrait (1080 x 1350px) tends to perform well because it takes up more vertical space in the feed, which means more screen real estate and more visibility. Square (1080 x 1080px) is the safe, versatile choice that works well everywhere. Avoid landscape formats for Instagram feed posts.
Do I need Canva Pro to create designs in multiple sizes?
No, but Pro makes it significantly faster. Free users can manually create designs at different sizes by copying elements between canvases. The Magic Resize feature, which does this in one click, is a Pro-only tool.